映像クリエイター・カメラマン
長谷川 敬介 (はせがわ けいすけ)
KSクリエイト / 合同会社ケーエス代表。
映像制作・写真撮影の実務経験をもとに、写真と動画の撮影・編集に特化したメディアを運営しています。現場で使えるテクニックやツールの使い方を、個人クリエイターや中小企業の広報担当者向けに発信しています。長年の実務経験をもとに、「すぐに使える」ノウハウを分かりやすく解説しています。
こんにちは!映像クリエイターの長谷川(@ksk_photo_man)です。
本記事では、Filmoraの使い方を解説します。具体的には、
- 字幕・テロップの入れ方
- 文字の変更
- デザインの変更
- 位置の変更
- 高度編集機能でできること
- デザインの保存
などです。
「Filmoraを使おうか検討中」「ダウンロードしたけど、使い方がイマイチわからない」という方は、ぜひ参考にしてください。
 けいすけ
けいすけ画像だけ見ても、やり方がわかるように記事を作りました!
関連» 【プロが解説】動画編集ソフトおすすめランキングベスト10
このソフトが自分に合っているか確認したい方は、先に診断ツールを使ってみるのもおすすめです。
字幕・テロップの入れ方
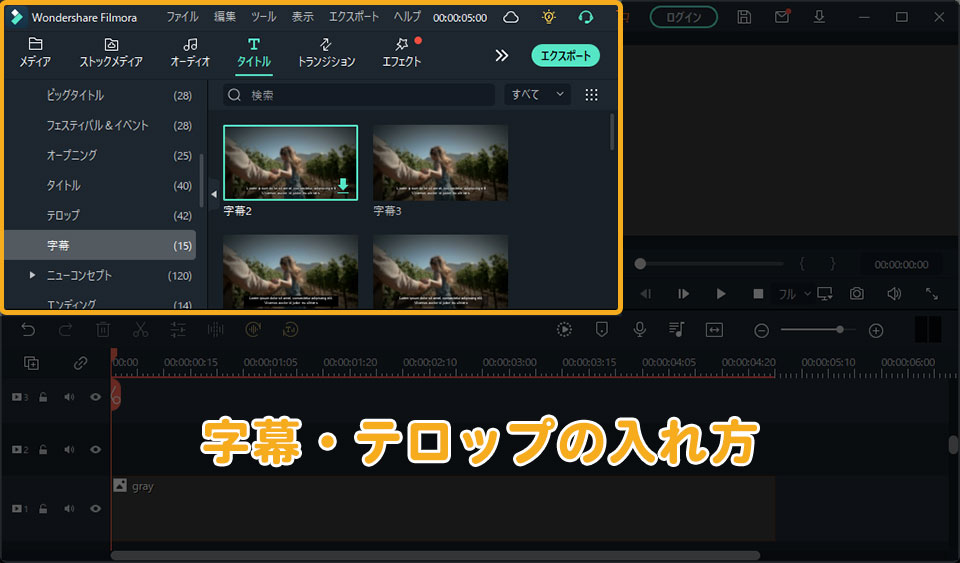
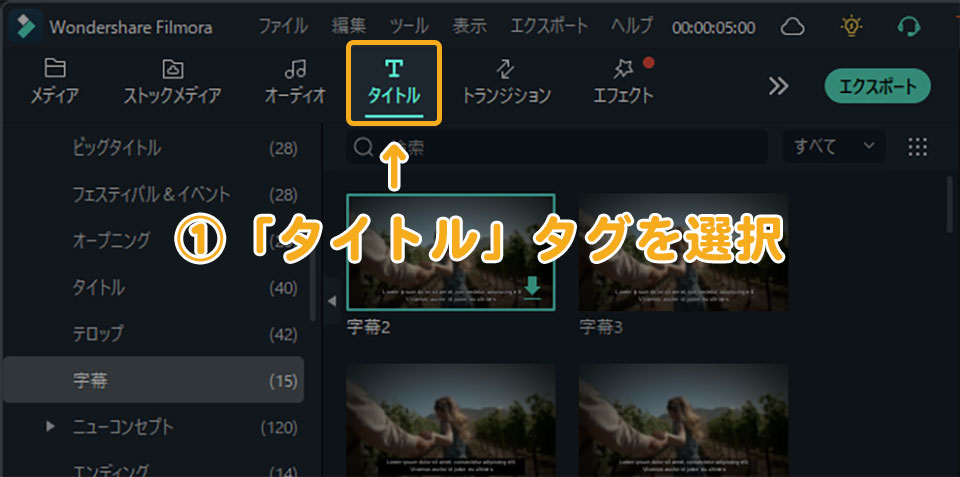
まず字幕・テロップの入れ方を解説します。字幕・テロップの入れ方は、
- 画面左上の「タイトル」タグを選択
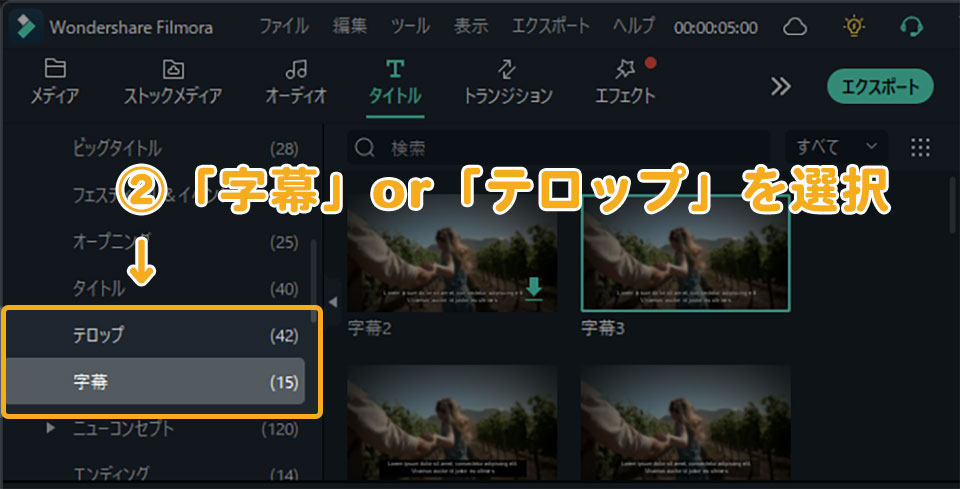
- 画面左にある「字幕」もしくは「テロップ」を選択
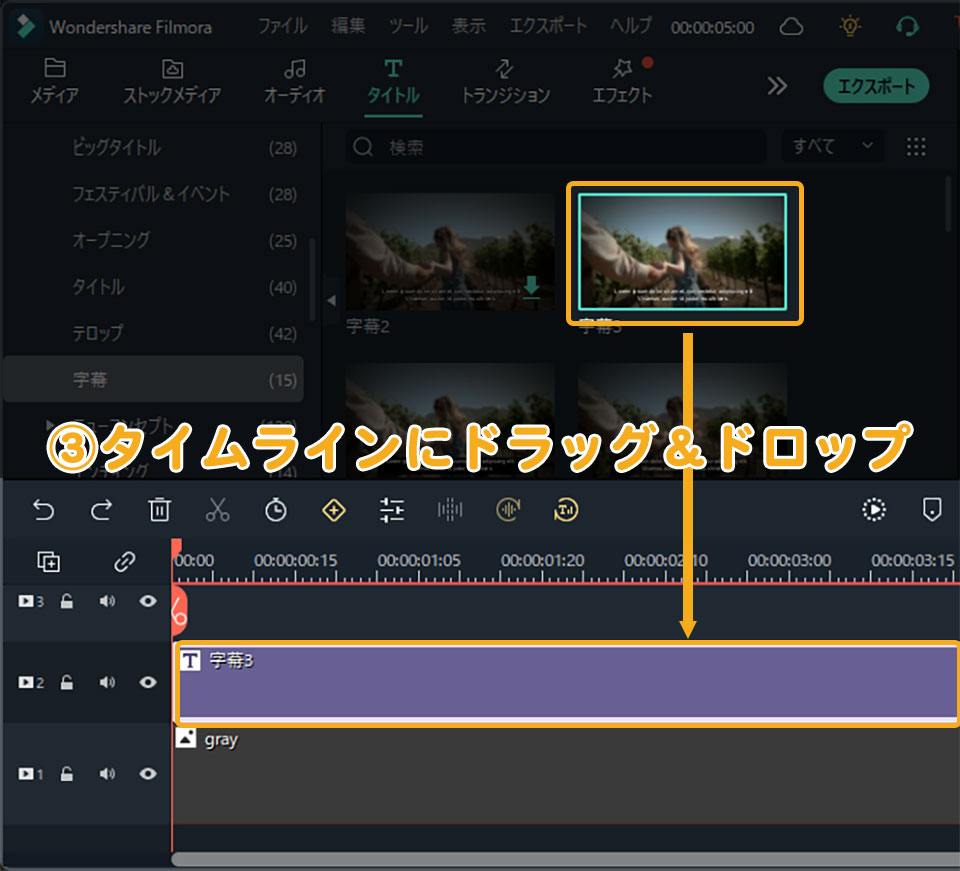
- 好きなタイトルをタイムラインにドラッグ&ドロップ
で動画に字幕・テロップを入れることができます。
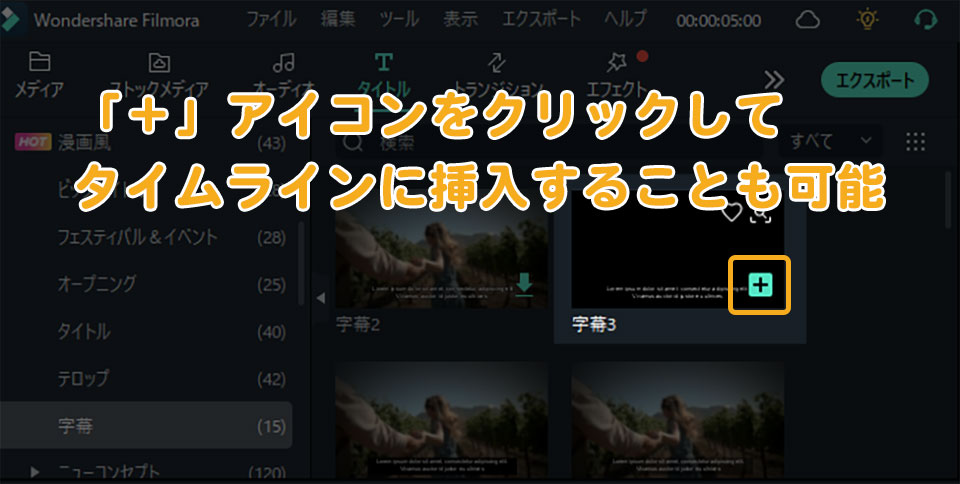
もしくは「字幕」「テロップ」の右下のアイコンをクリックしてダウンロードした後、「+」アイコンをクリックしてタイムラインに挿入することも可能です。
「字幕」や「テロップ」は何種類あるの?
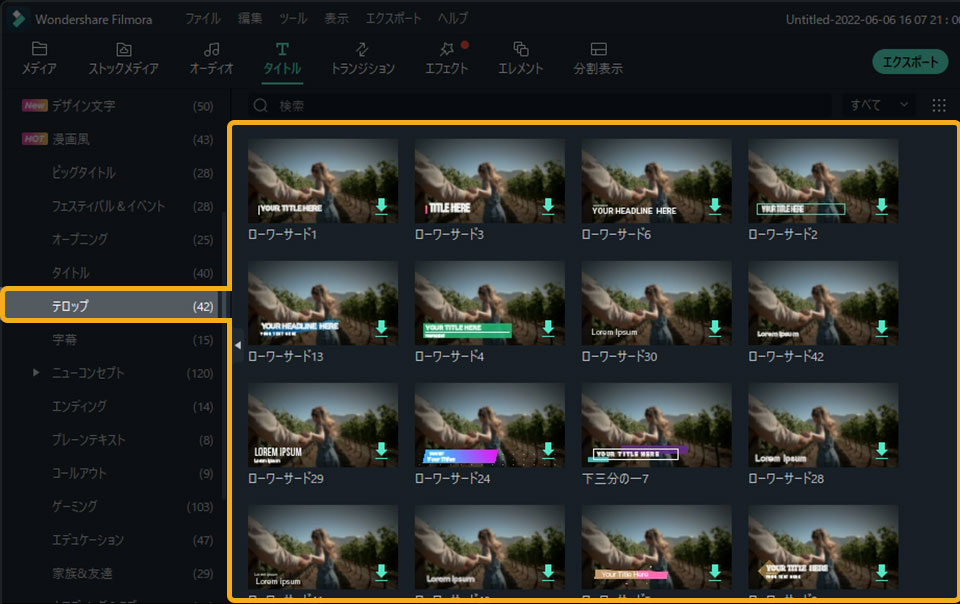
字幕は、15種類
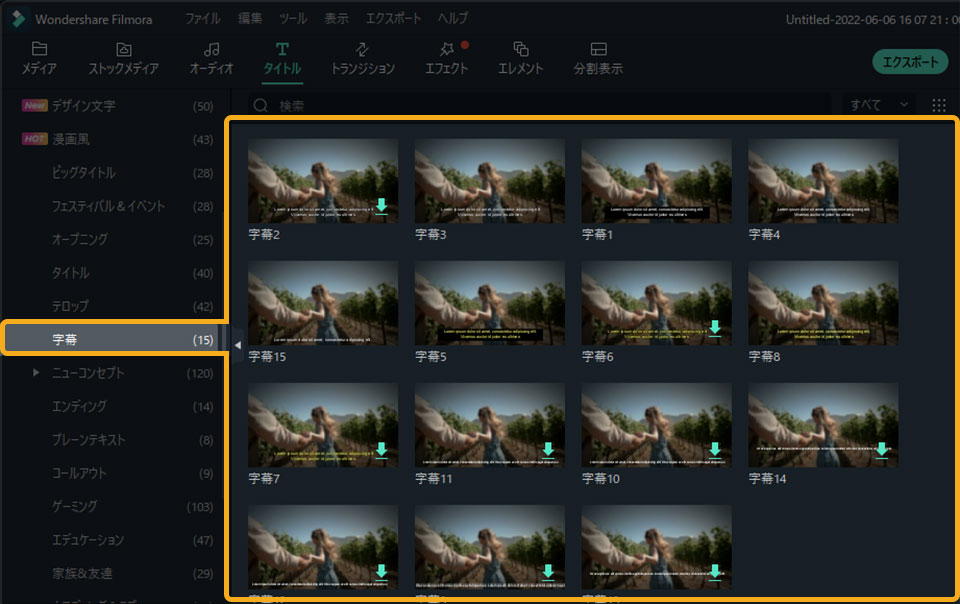
テロップは、42種類
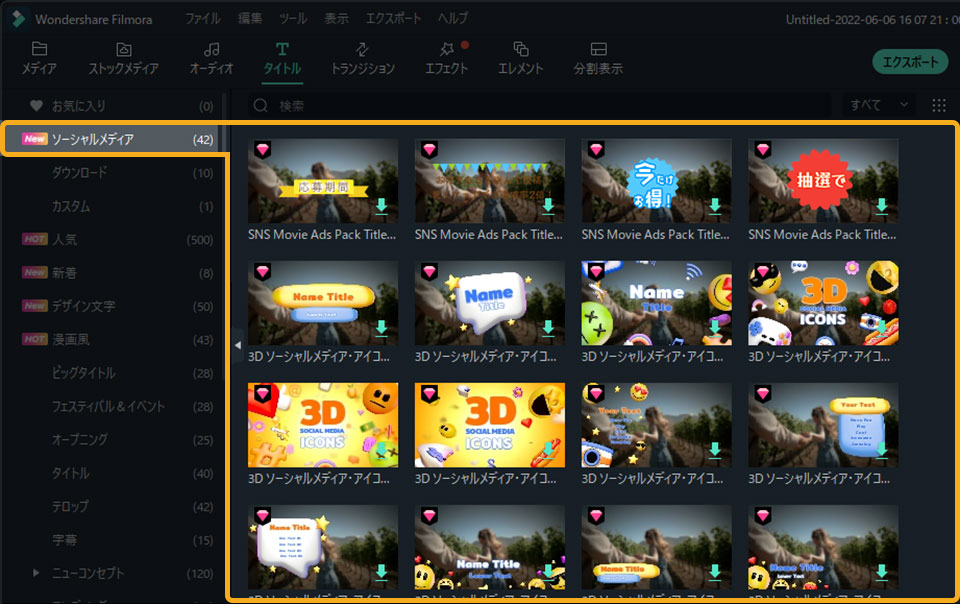
タイトルタグには、ほかにどんな項目があるの?
タイトルタグの中に、次の22種類のテキストが用意されています。
- ソーシャルメディア
- 人気
- 新着
- デザイン文字
- 漫画風
- ビッグタイトル
- フェスティバル&イベント
- オープニング
- タイトル
- テロップ
- 字幕
- ニューコンセプト
- エンディング
- プレーンテキスト
- コールアウト
- ゲーミング
- エデュケーション
- 家族&友達
- ウェディング&ラブ
- シーズナル
- ライフスタイル
- ビジネス
字幕・テロップの文字を変更する方法
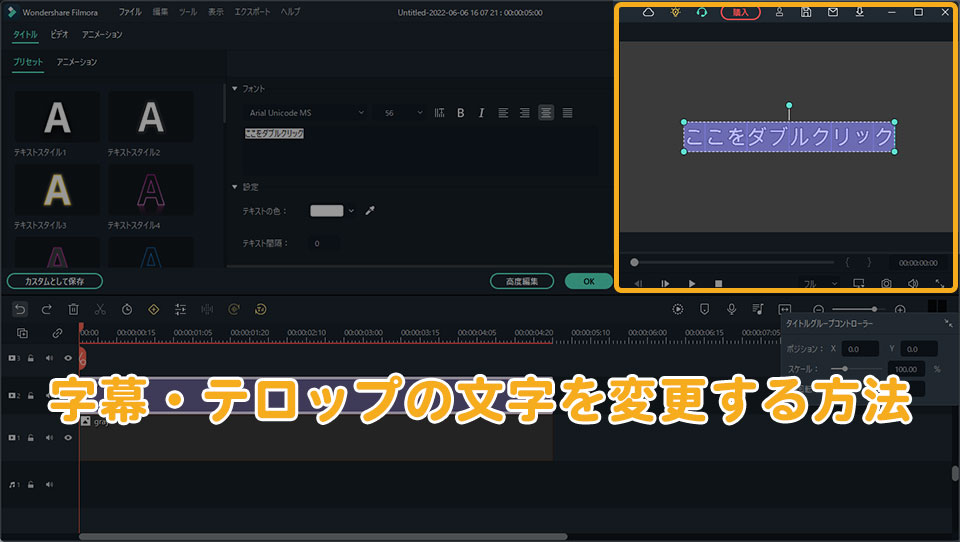
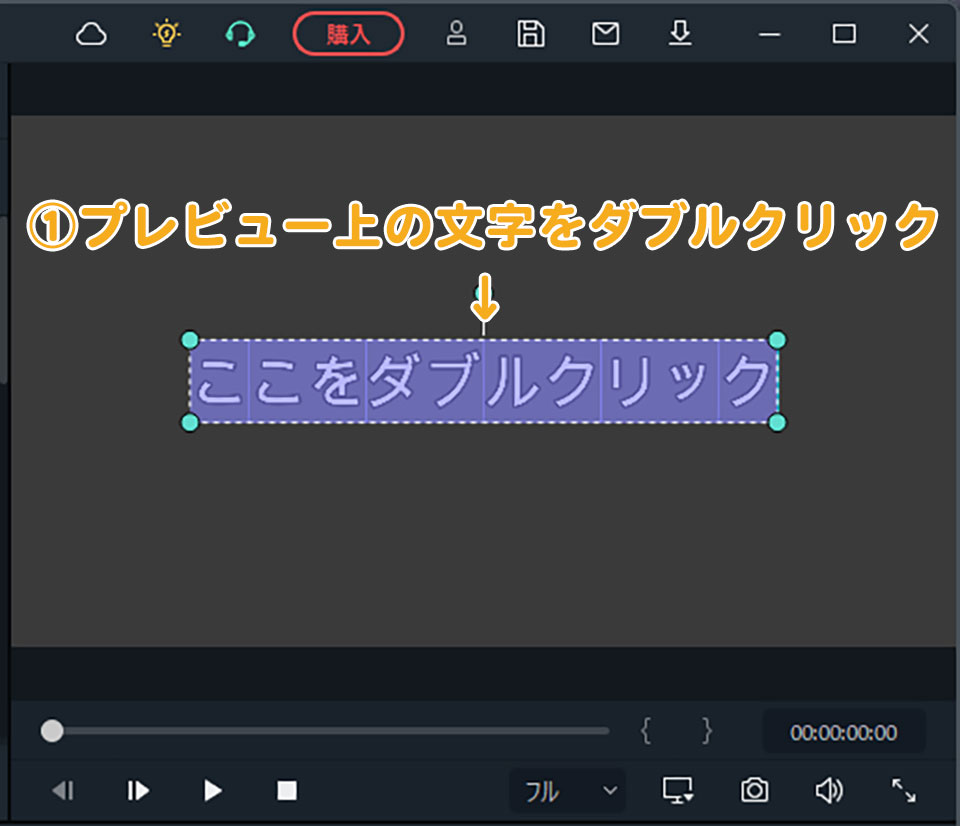
次は、字幕・テロップの文字を変更する方法を解説します。字幕・テロップの文字を変更したいときは、
- プレビュー上の文字をダブルクリック
- 文字を変更
で文字を変更できます。
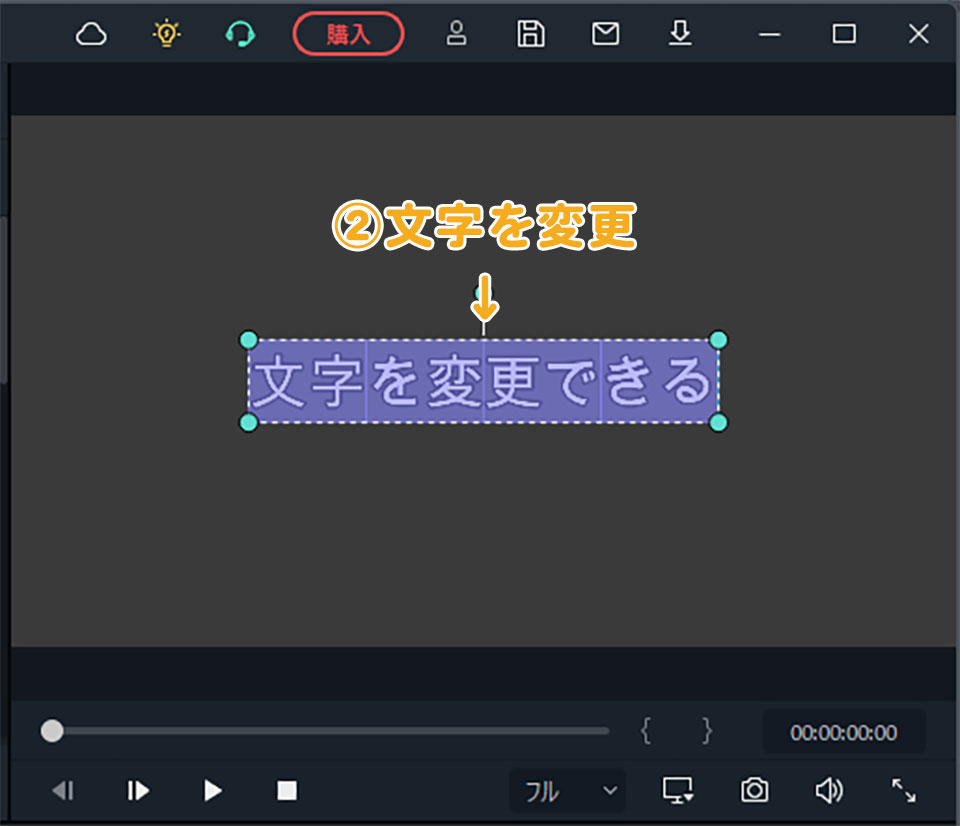
画面右上のプレビュー上の文字をダブルクリックすると、テキストが青く表示されます。
テキストが青く表示された状態で、文字を入力すれば反映されます。
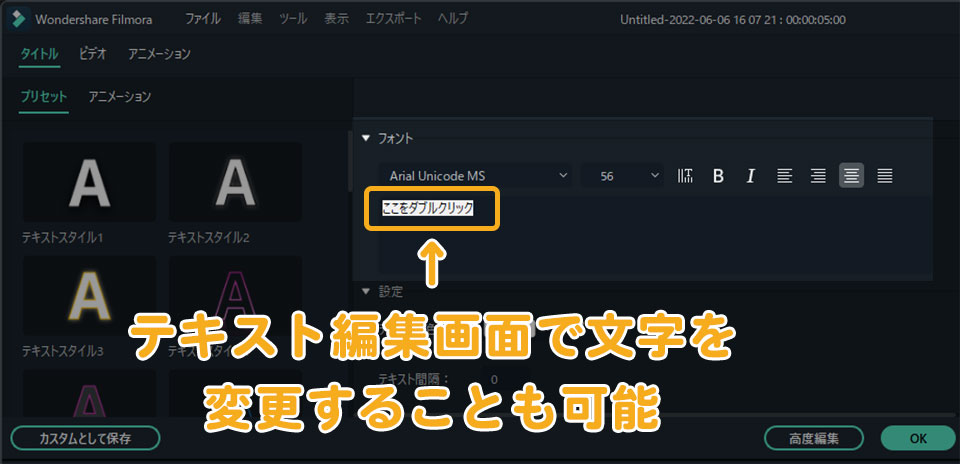
もしくは、画面左上のテキスト編集画面で文字を変更することも可能です。
字幕・テロップのデザイン変更方法
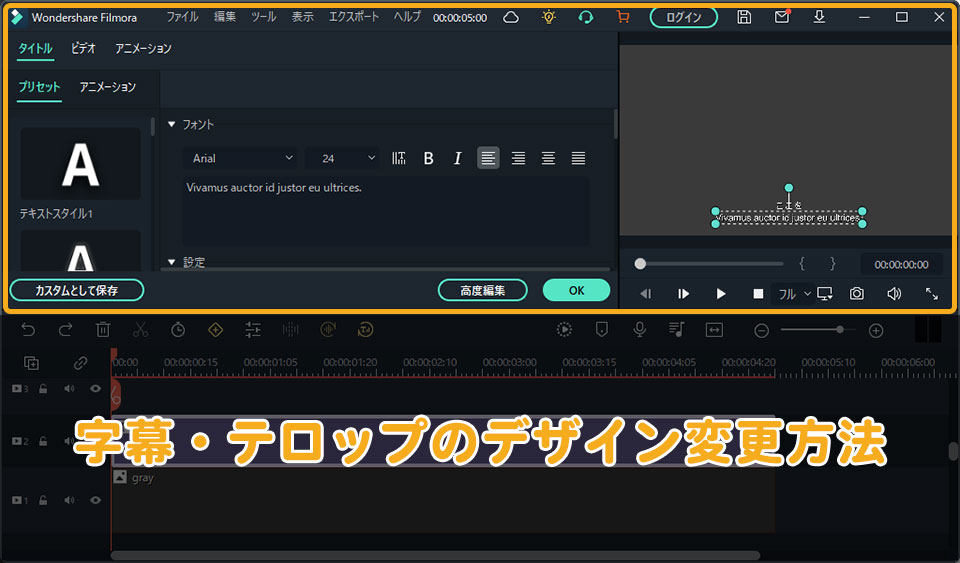
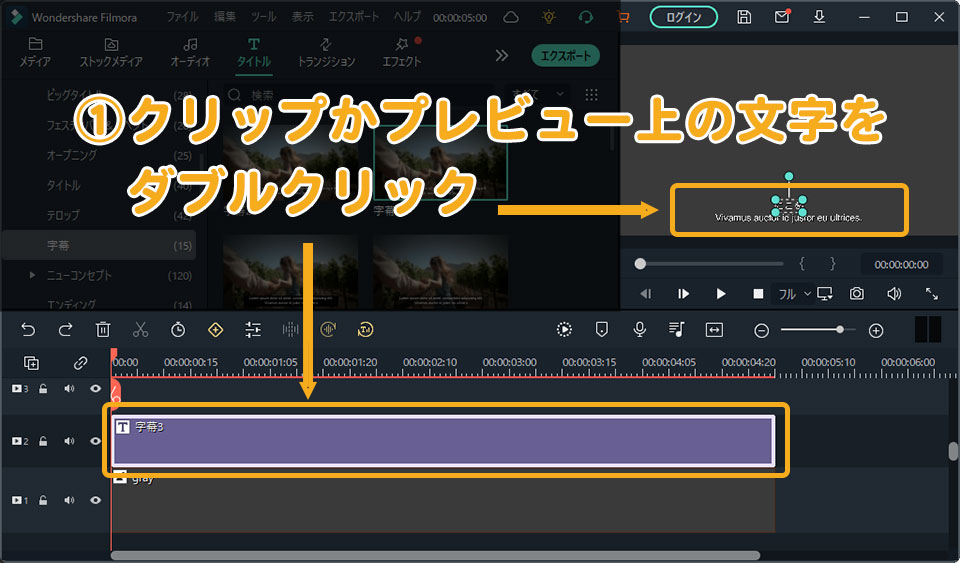
字幕・テロップのデザイン変更はテキスト編集画面で行います。 やり方は、
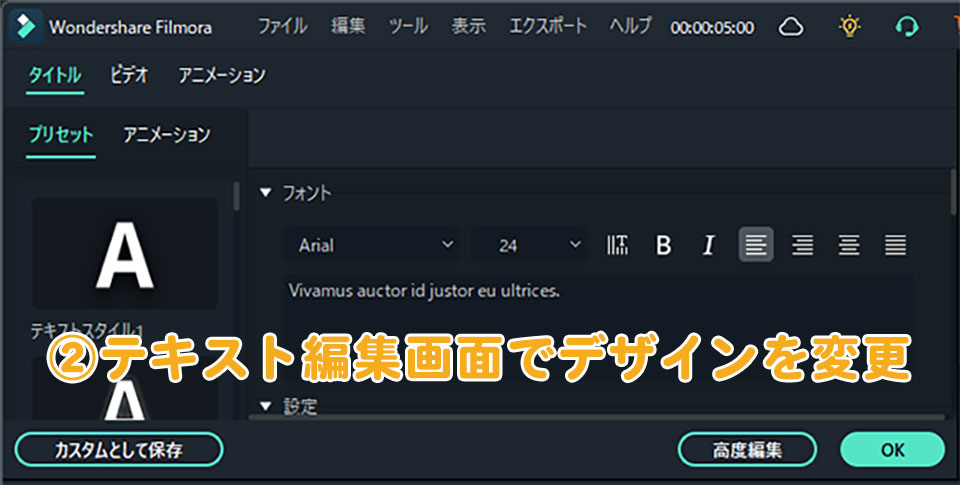
- クリップかプレビュー上の文字をダブルクリック
- テキスト編集画面でデザインを変更
です。
テキスト編集画面は、なにができるの?
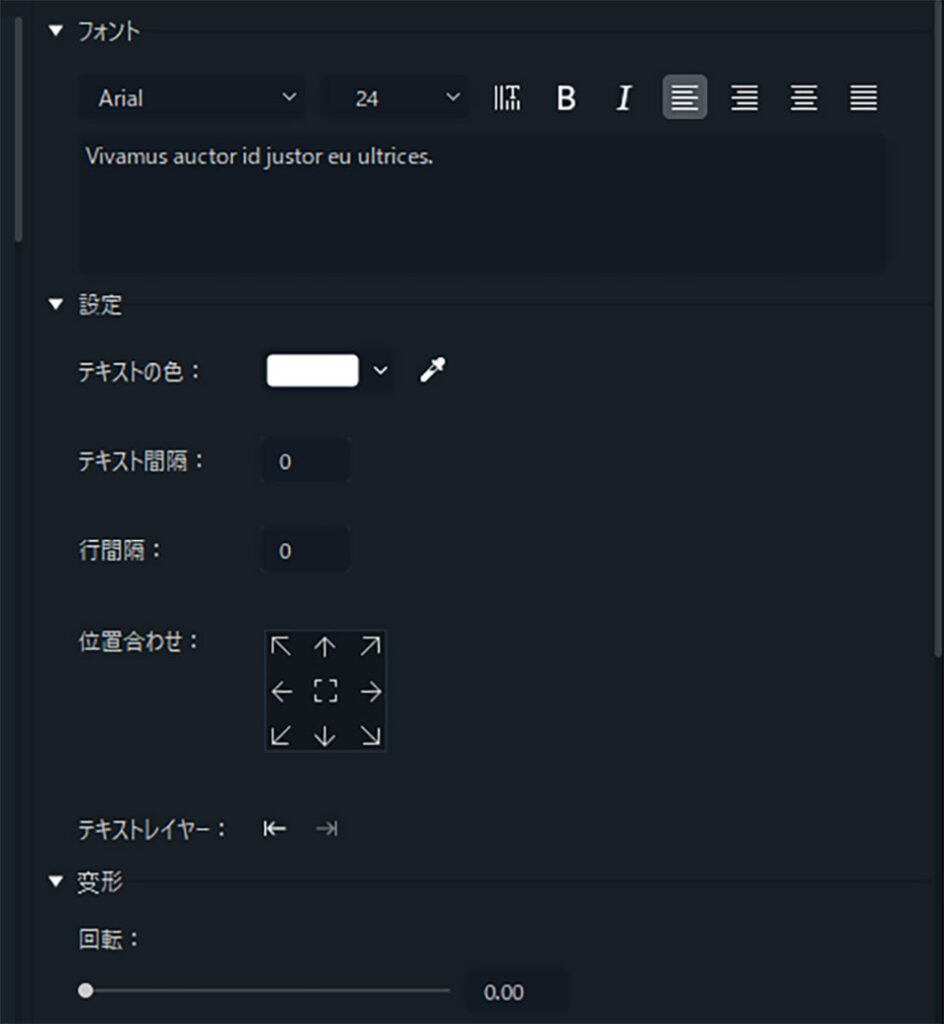
テキスト編集画面では、次のデザインが変更できます。
- フォント
- サイズ
- 文字の位置
- テキストの色
- テキストの間隔
- 行間
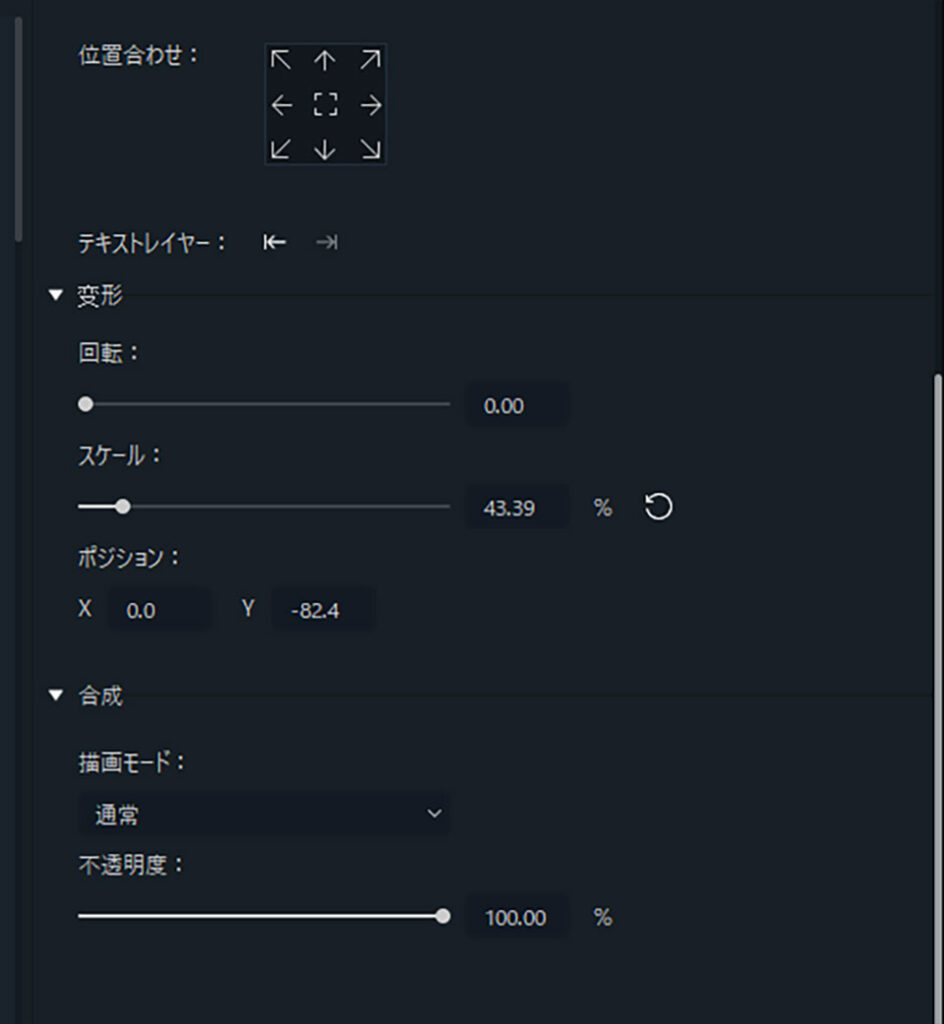
- 回転
- 描画モードの変更
- 不透明度
など。
また、プリセットも23種類用意されています。好みのプリセットを選択するだけで、 字幕テロップのデザインを変更することも可能です。

字幕・テロップの位置の変更方法
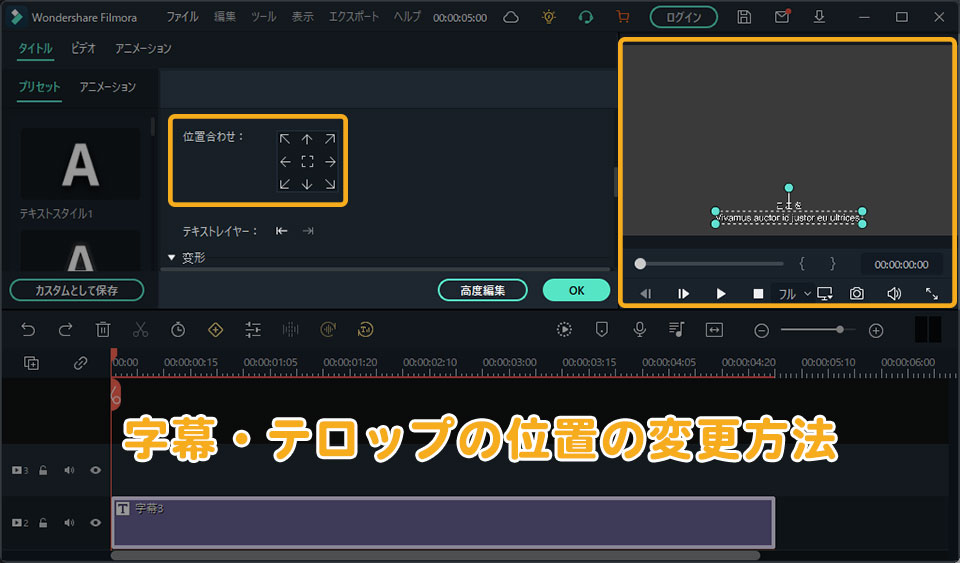
次は、字幕・テロップの位置の変更方法を解説します。やり方は、次の3つがあります。
- ドラッグ&ドロップで位置を変更する
- テキスト編集画面の「位置合わせ」で変更する
- タイトルグループコントローラーで位置を変更する
それぞれ解説していきます。
1. ドラッグ&ドロップで位置を変更する
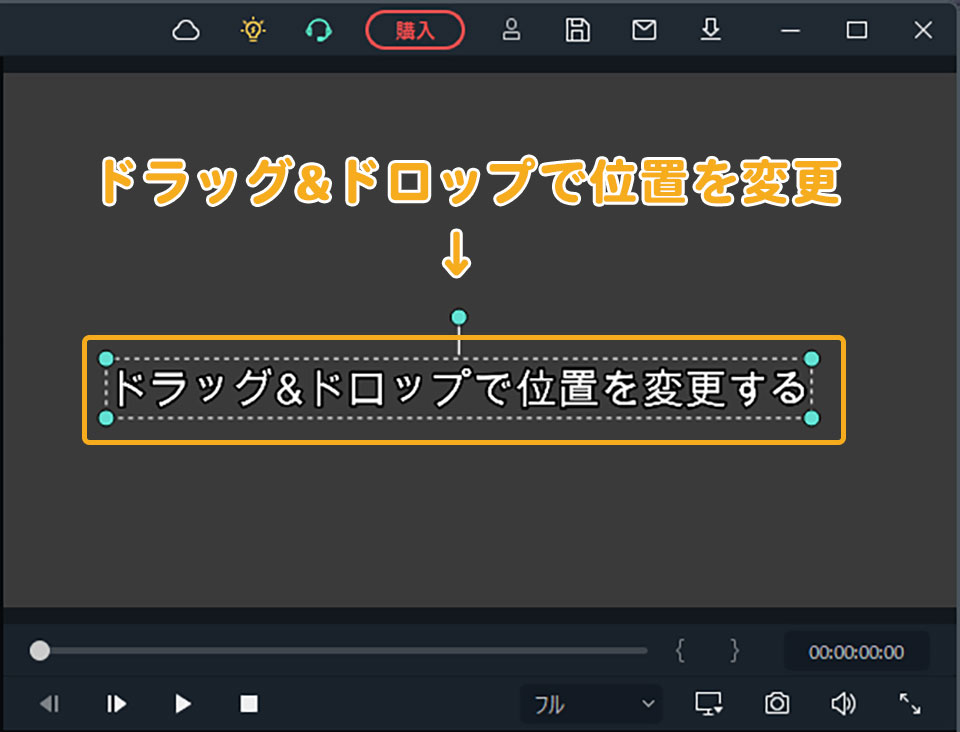
1つ目の方法が、プレビュー上の文字をドラッグ&ドロップすることです。マウス操作で位置を変更できるため、直感的に配置できます。
また字幕テロップを移動させるとプレビュー上に中心線のガイドラインが表示されます。中心線のガイドラインを参考に位置を決めましょう。

2. テキスト編集画面の「位置合わせ」で変更する
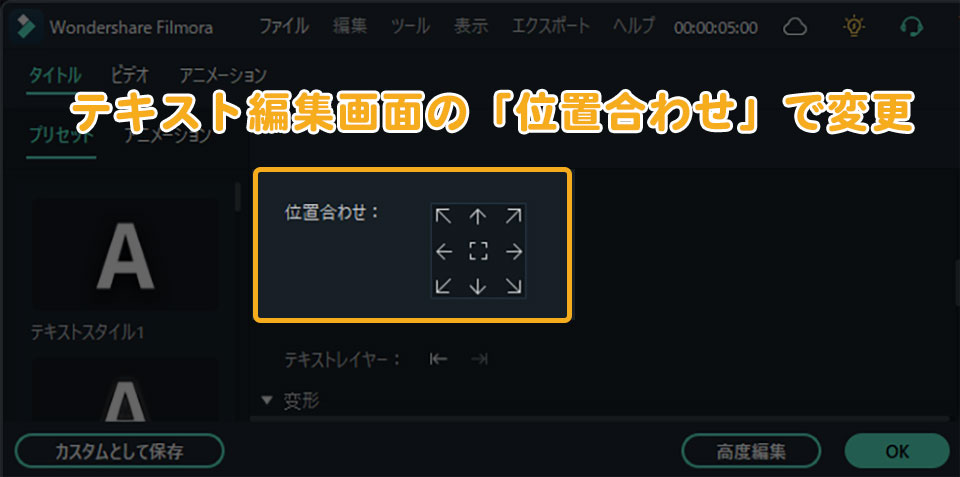
2つ目の方法は、テキスト編集画面の「位置合わせ」を使うことです。 「位置合わせ」は、テキスト編集画面の「設定」内にあります。 上下左右など、9ヵ所の位置から選択できます。
3. タイトルグループコントローラーで位置を変更する
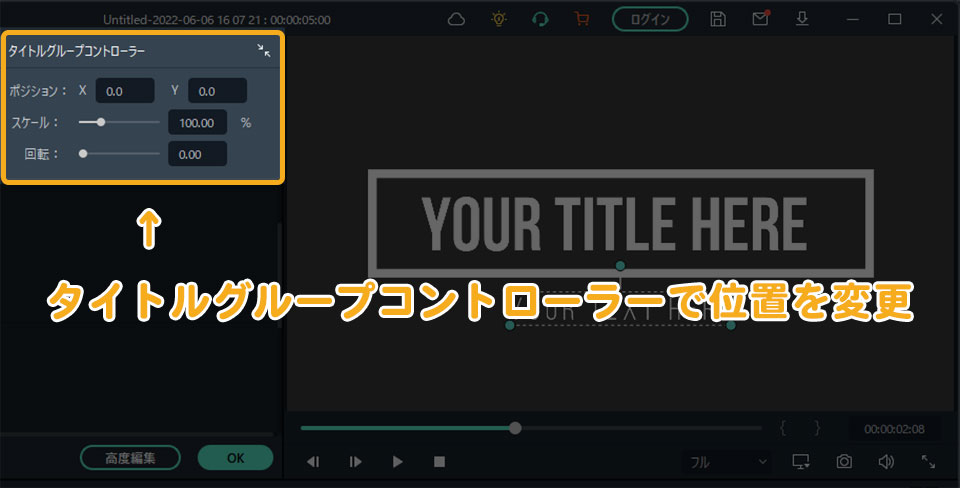
3つ目の方法は、「タイトルグループコントローラー」を使うことです。「タイトルグループコントローラー」は、テキストクリップをダブルクリックすると表示されます。
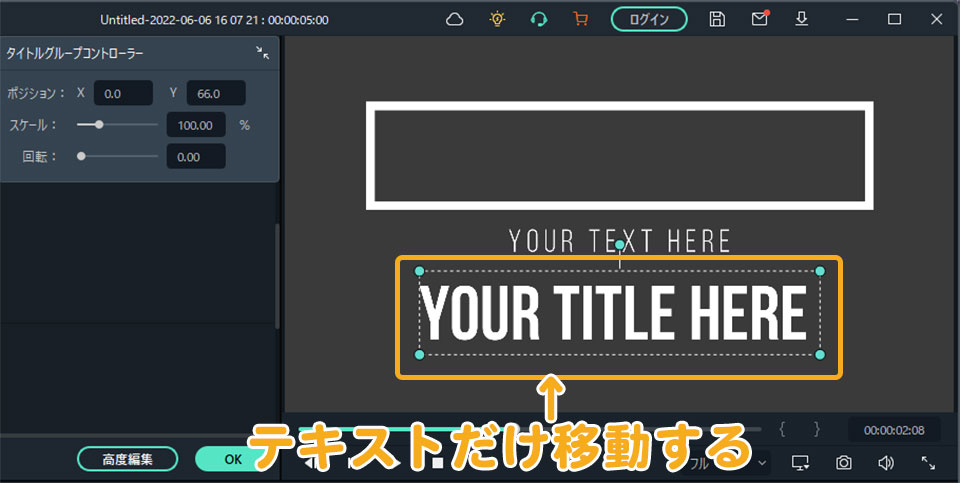
タイトルグループコントローラーを使って変更するメリットは、 文字や図形をまとめて移動できることです。
例えば、 次のようなタイトルの時にドラッグ&ドロップで移動すると、文字だけが移動してしまいます。
一方、「タイトルグループコントローラー」のポジションで移動させると、文字と図形を一緒に移動できます。
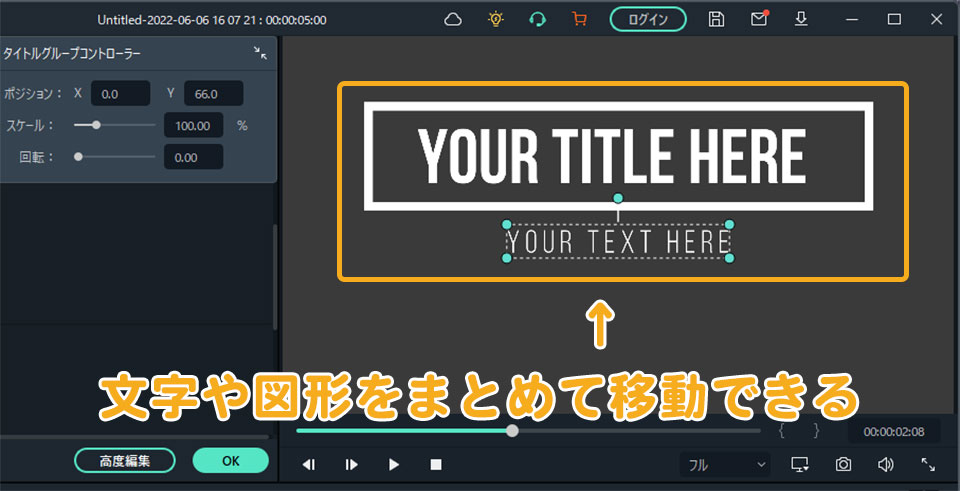
複数の文字・図形が使われているタイトルの時は、「タイトルグループコントローラー」のポジションで移動させることをオススメします。
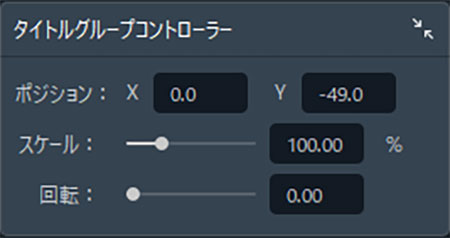
タイトルグループコントローラーは、なにができるの?
タイトルグループコントローラーでは、次の3つが調整できます。
- ポジション(位置)
- スケール(大きさ)
- 回転
高度編集機能でできること
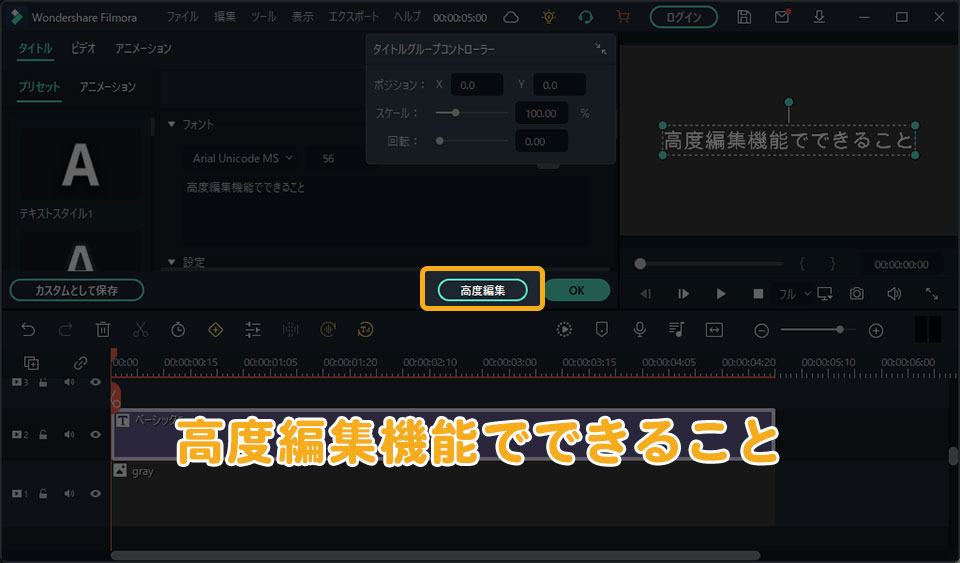
テキスト編集には、「高度編集機能」もあります。「高度編集機能」では主に次の編集ができます。
- テキストの編集(縁取り・影文字など)
- 図形や画像の追加
- アニメーションの追加
- 字幕・テロップを複数追加
それぞれ簡単に解説します。
1. テキストの編集(縁文字・影文字など)
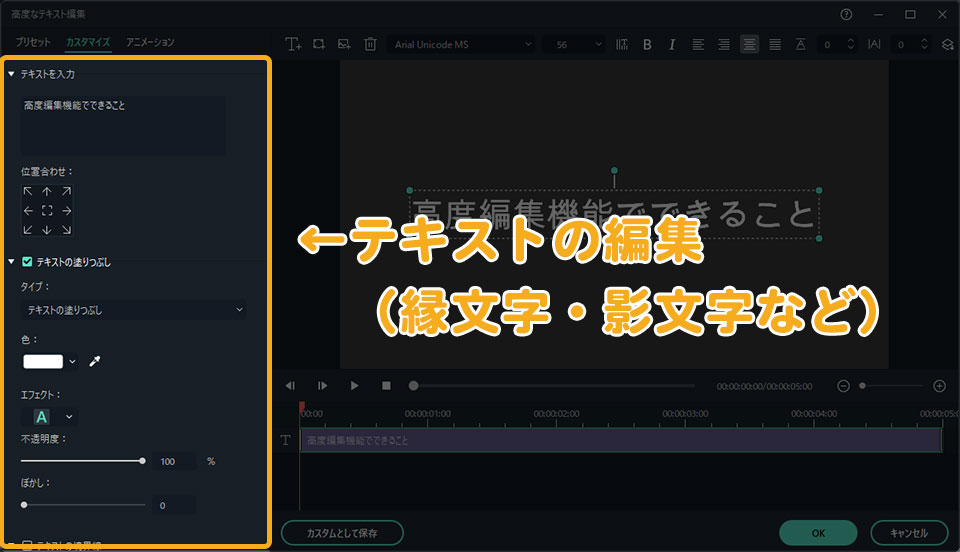
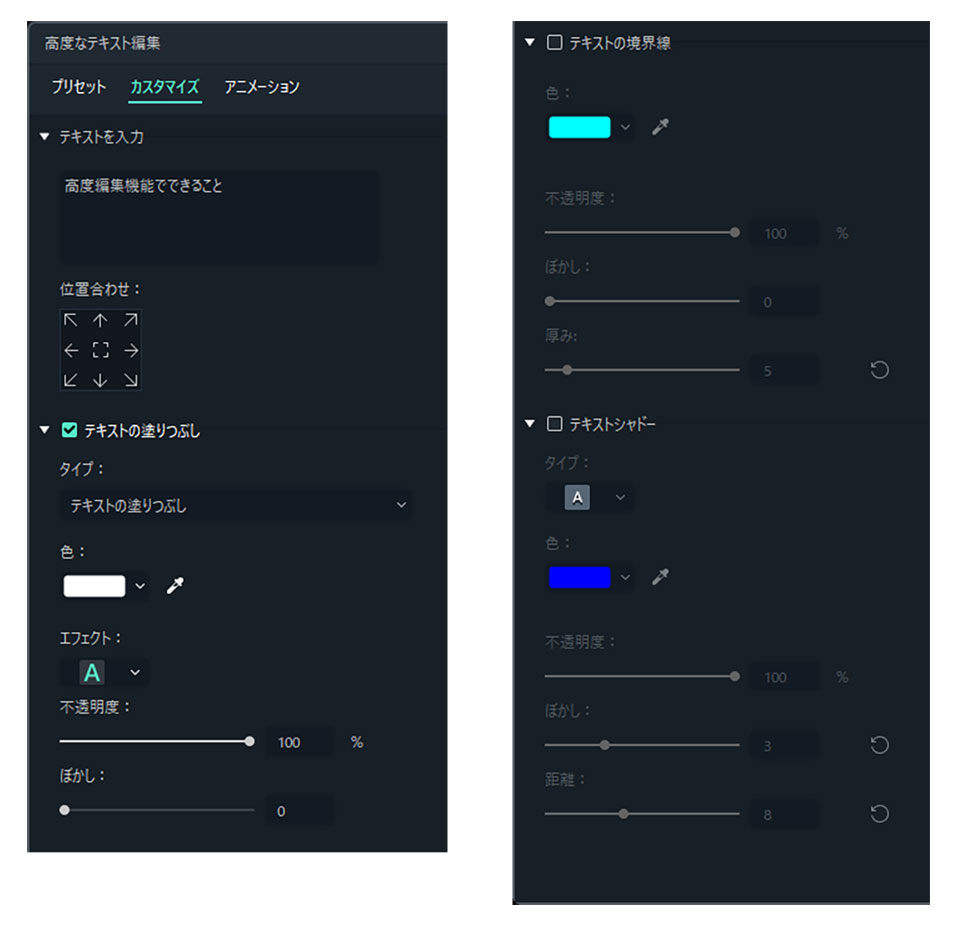
テキストの編集は、「高度なテキスト編集」画面の左側で行います。
ここでは、「文字の変更」「位置合わせ」の他にも、
- テキストの境界線(縁文字)
- テキストシャドー(影文字)
などの編集・設定ができます。
2. 図形や画像の追加
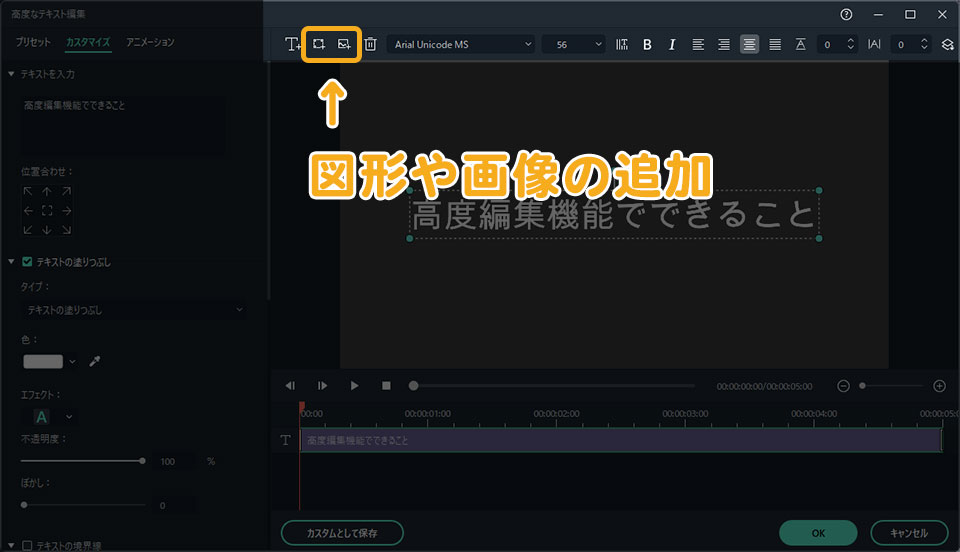
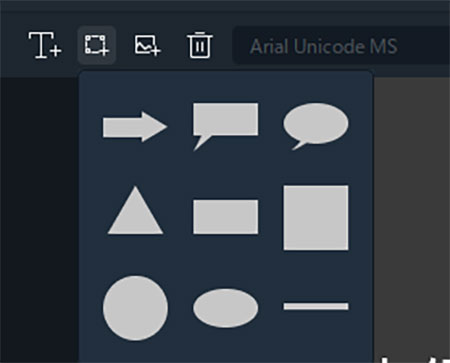
図形や画像を追加したい時は画面上部のツールバーで行います。図形を追加したい時は、ツールバーの左から2番目にある「形状を追加」を選択します。
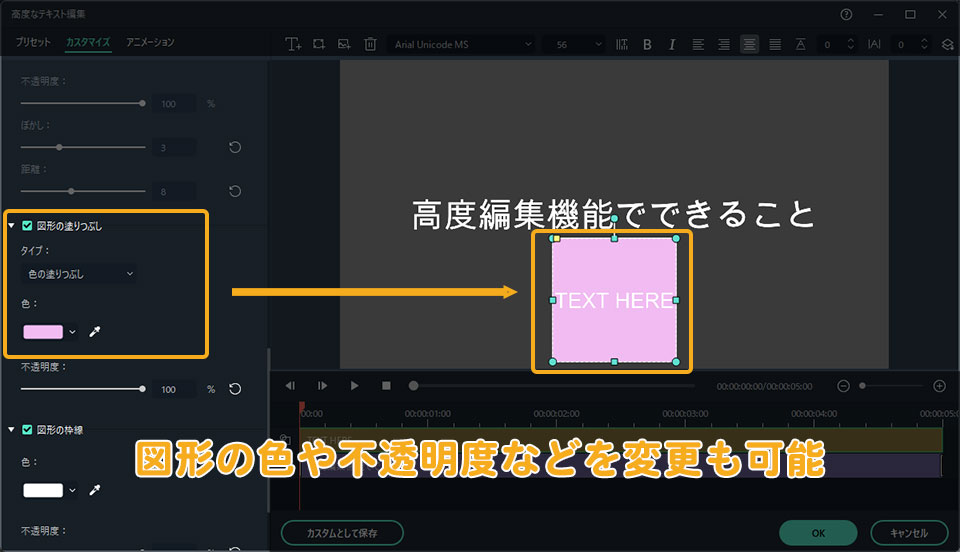
図形が表示されるのでお好みの図形を選択して、動画に図形を追加できます。
画面左のカスタマイズ内で、図形の色や不透明度などを変更できます。
図形は何種類あるの?
図形は、次の9種類が用意されています。
3. アニメーションの追加
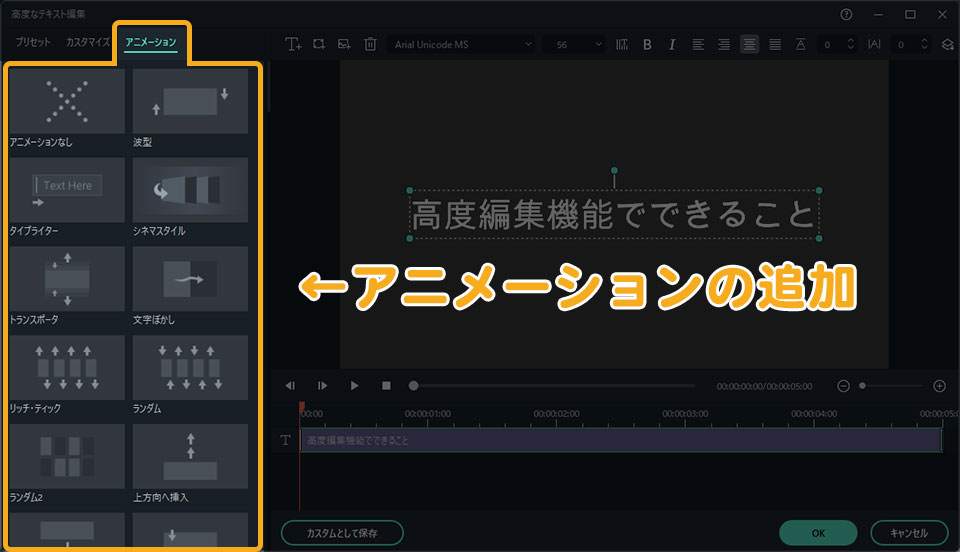
テキストにアニメーションをつけたい時は、「アニメーション」タブで行います。「アニメーション」タブには、あらかじめ多くのアニメーションが用意されています。
任意のアニメーションをダブルクリックで、対象のクリップにアニメーション効果をつけることができます。
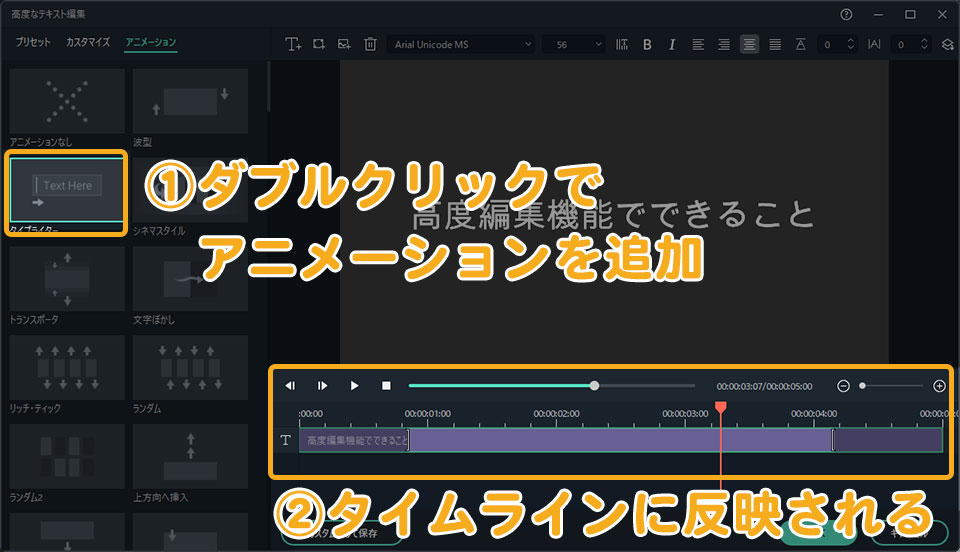
アニメーション効果の長さの調整は、「高度なテキスト編集」画面の下にあるタイムラインで調整できます。
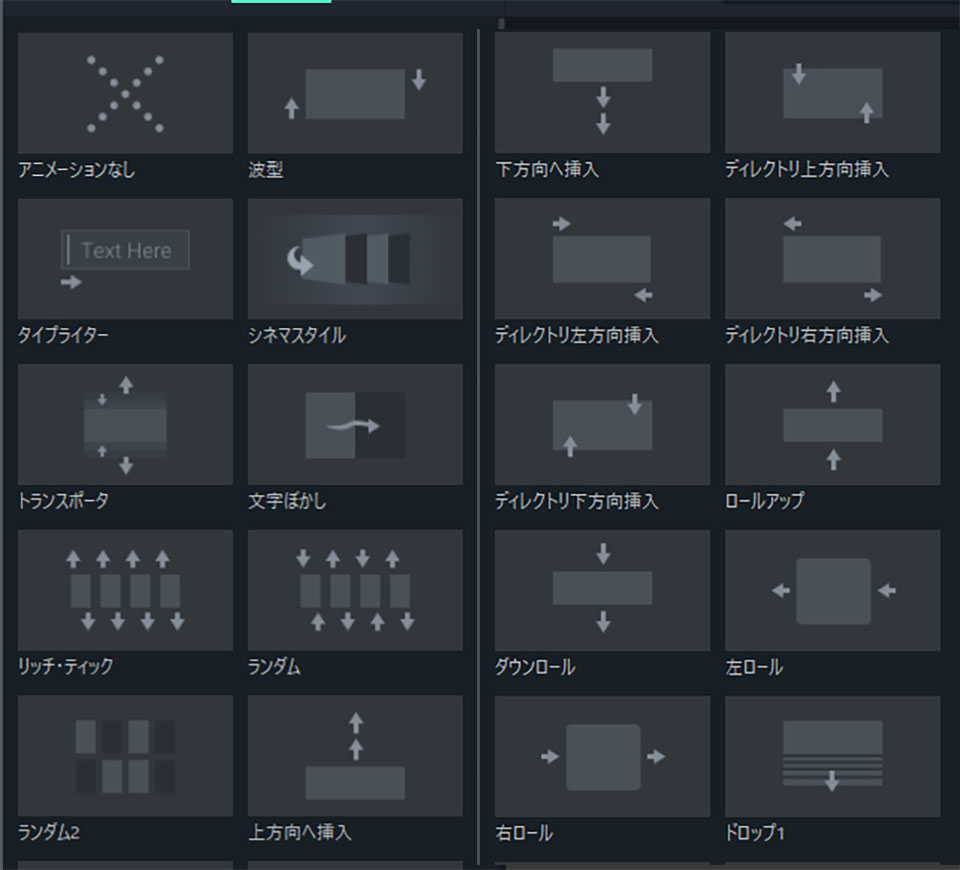
アニメーションは何種類あるの?
アニメーションは、約100種類あります。一部紹介します。
- 波型
- タイプライター
- 文字ぼかし
- ランダム
- ロールアップ
- 右ロール
- スピン
- ストレッチズームイン
4. 字幕を複数追加
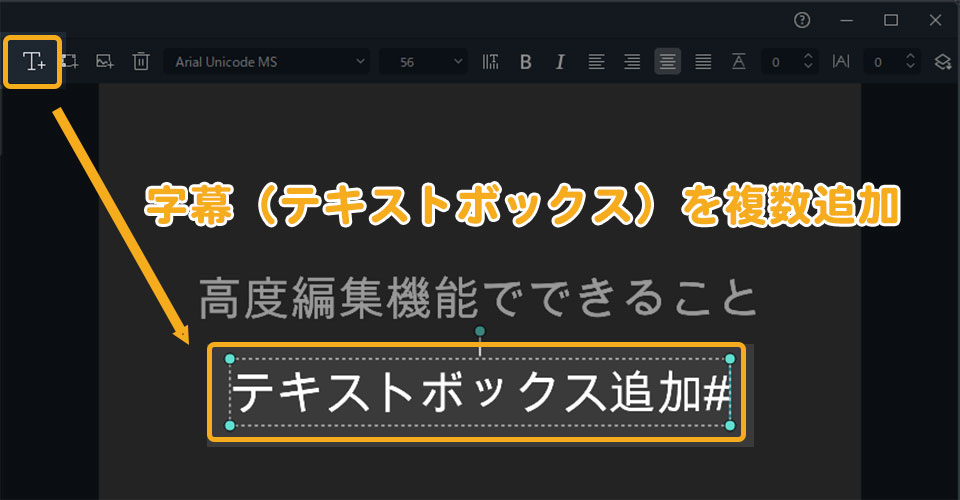
字幕を複数追加したい時は「テキストボックスを追加」で行います。「テキストボックスを追加」をクリックすると、さらにテキストを追加できます。
この方法のメリットは、複数のテキストを1クリップにまとめることができることです。
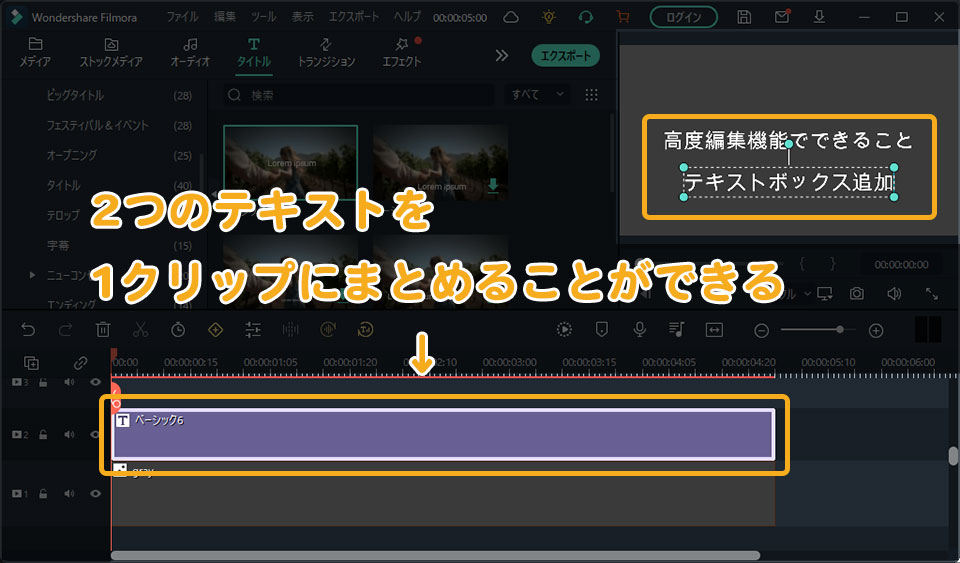
この状態で、タイトルグループコントローラー内で
- 移動(ポジション)
- 拡大(スケール)
- 回転
をすればまとめて調整できます。また長さ調整もまとめてできるため、作業の効率化に繋がります。
字幕・テロップのデザインを保存する方法
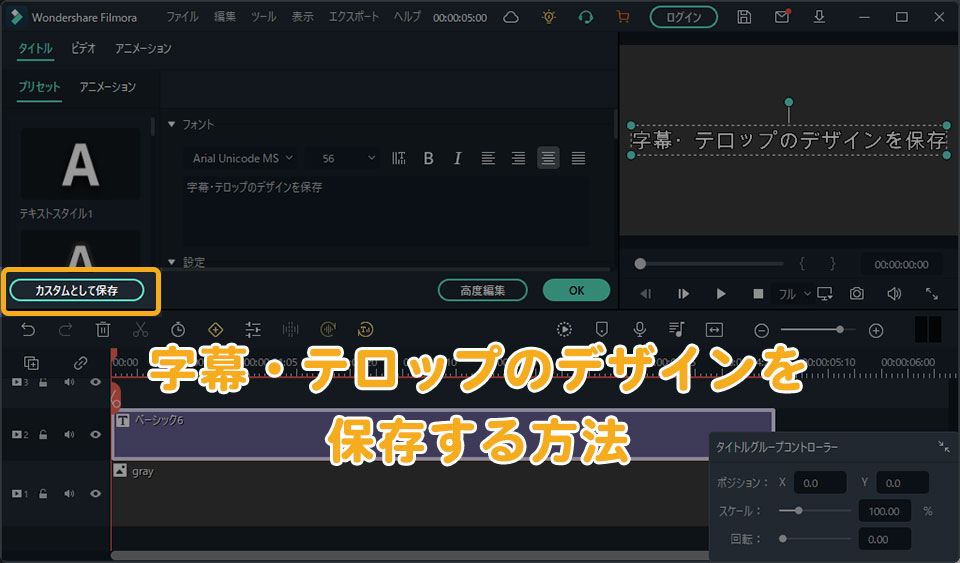
次は字幕・テロップのデザインを保存する方法を解説します。デザイン保存の手順は次のとおりです。
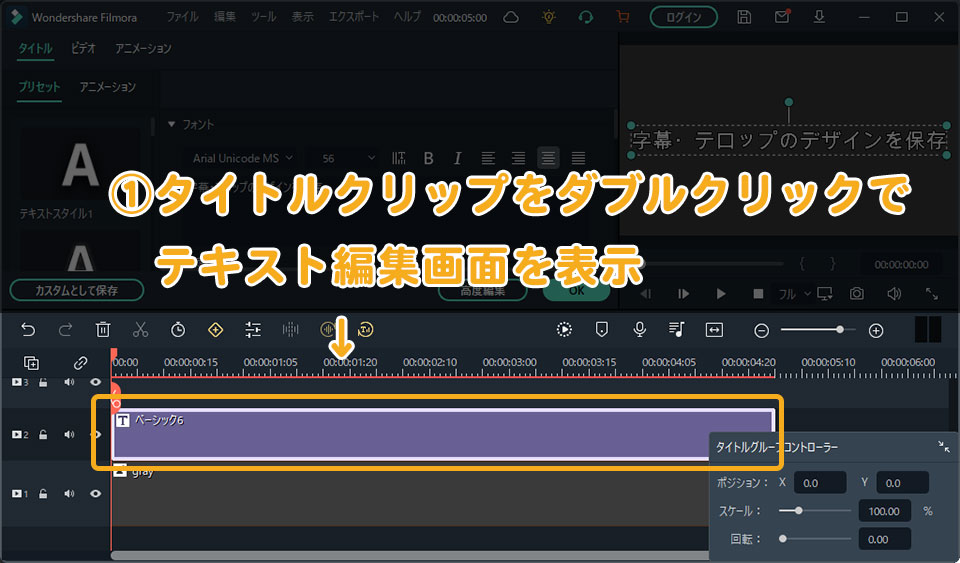
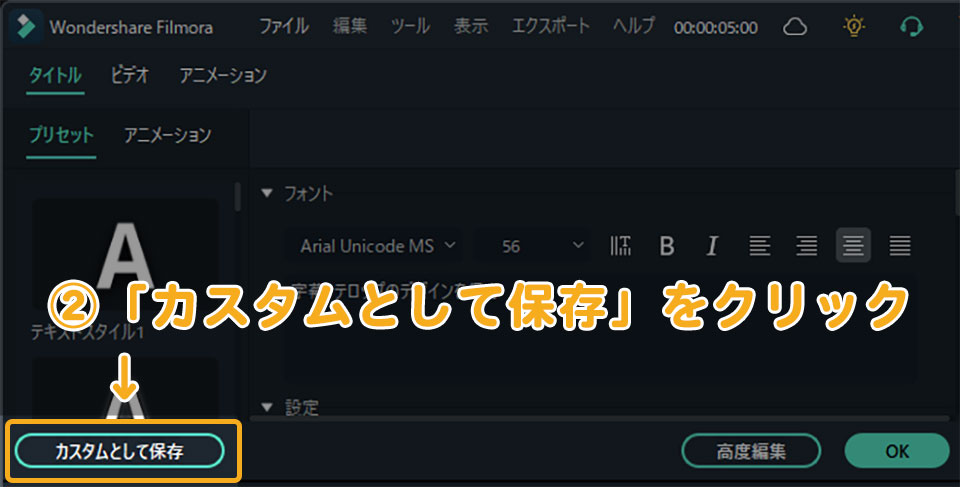
- タイトルクリップをダブルクリックでテキスト編集画面を表示
- 左にある「カスタムとして保存」をクリック
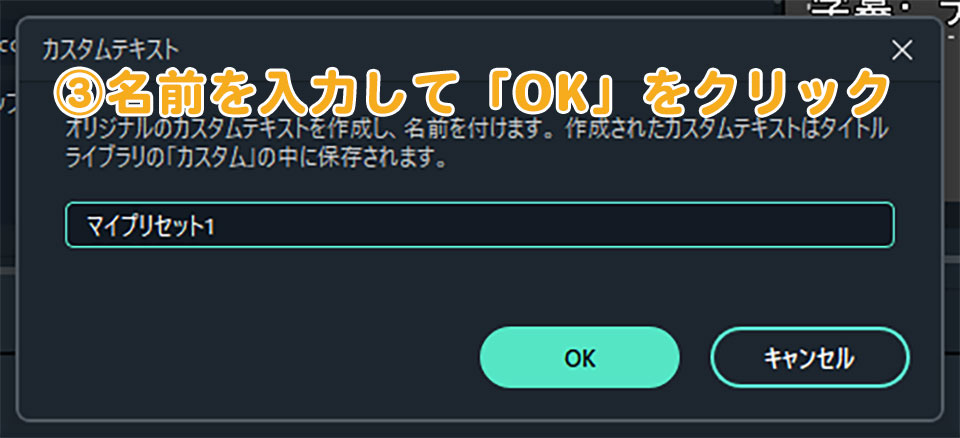
- 名前を入力して「OK」をクリック
これで保存できます。
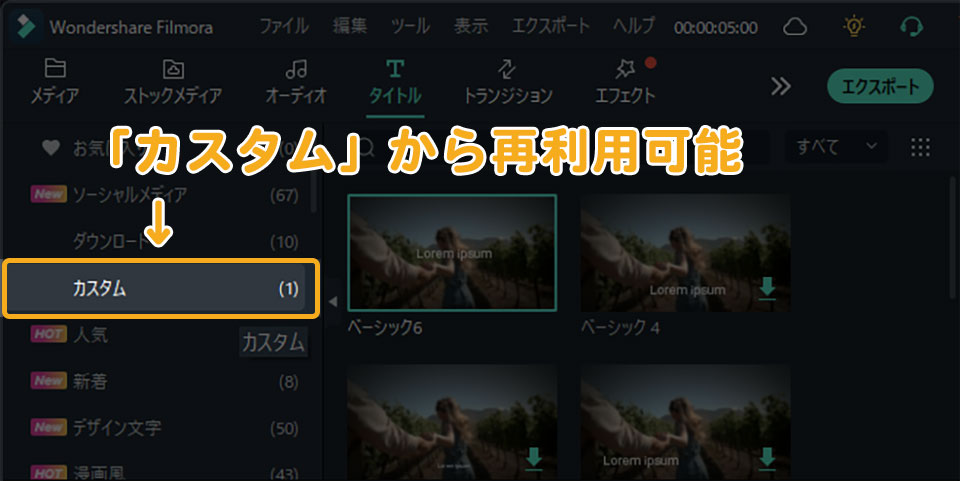
保存したタイトルは、 タイトル内(メイン画面)の「カスタム」に保存されます。
字幕・テロップを自動で入れる方法
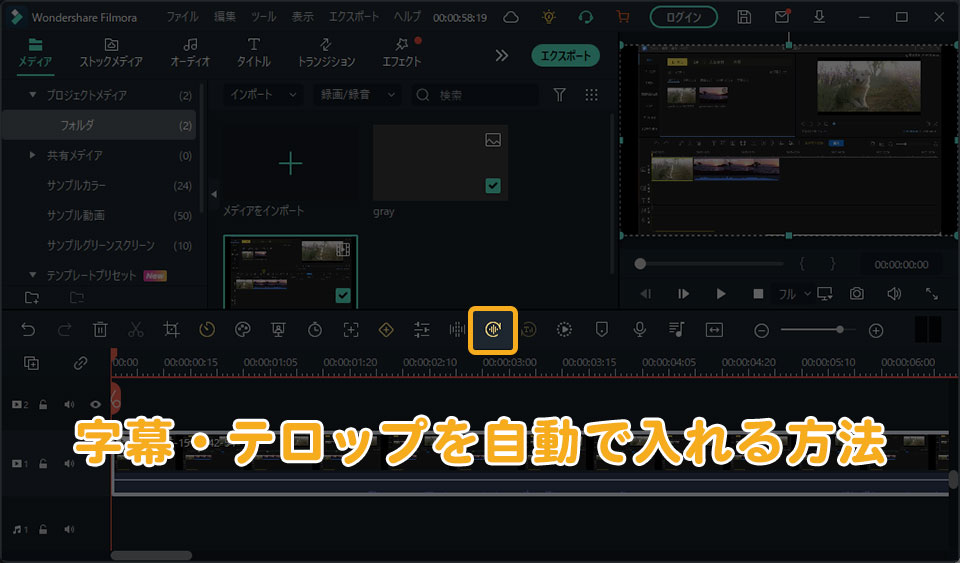
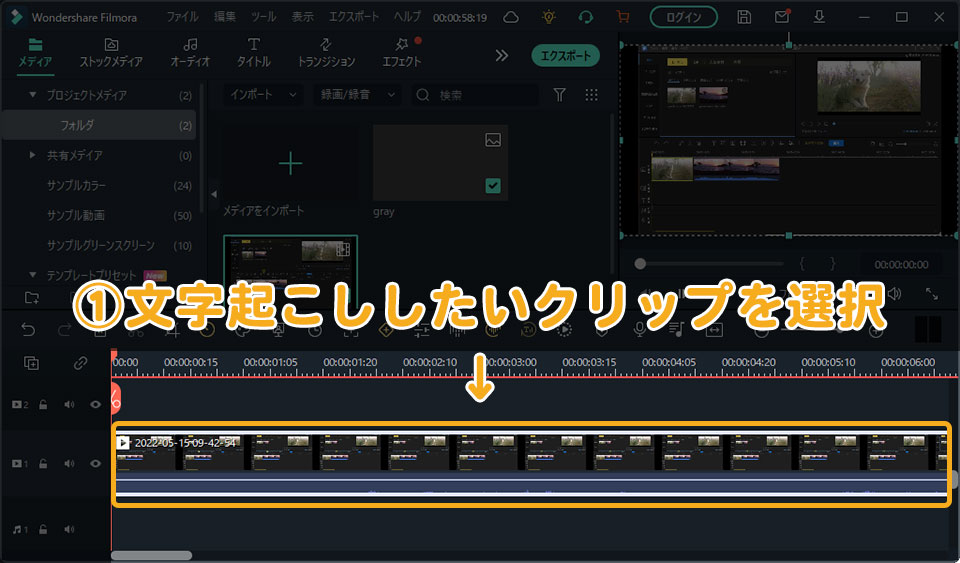
次は、字幕・テロップを自動で入れる方法を解説します。字幕・テロップを自動で入れたい時は、「自動文字起こし」機能を使います。やり方は、
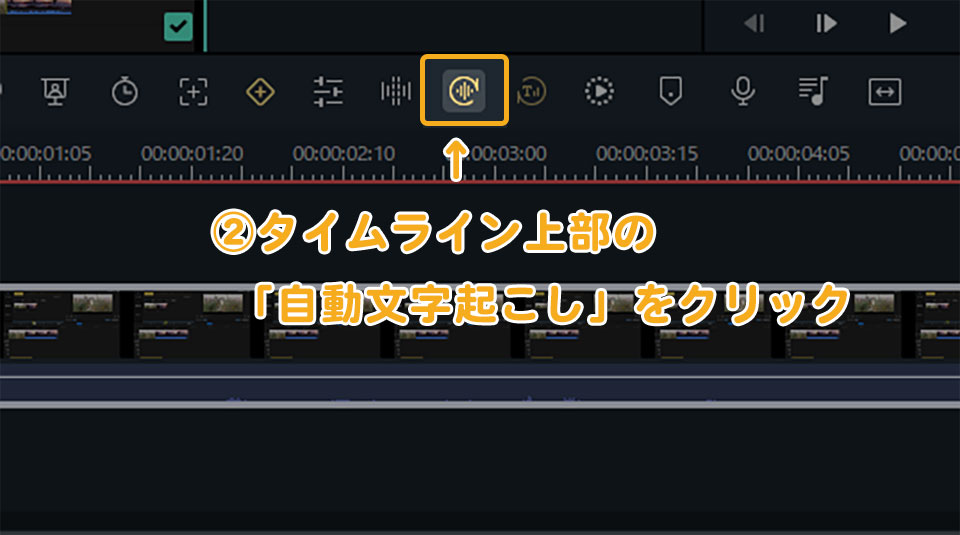
- 文字起こししたいクリップを選択
- タイムライン上部の「自動文字起こし」をクリック
です。または、右クリック「自動文字起こし」を選択でもできます。
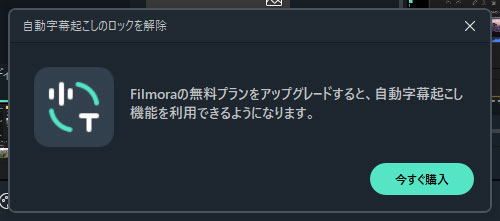
※ただし自動文字起こしは、有料です。(Filmoraライセンスに30分間分含まれている)。無料で自動文字起こししたい場合は、Vrewとの併用がオススメです。
字幕が入らない時の対処法
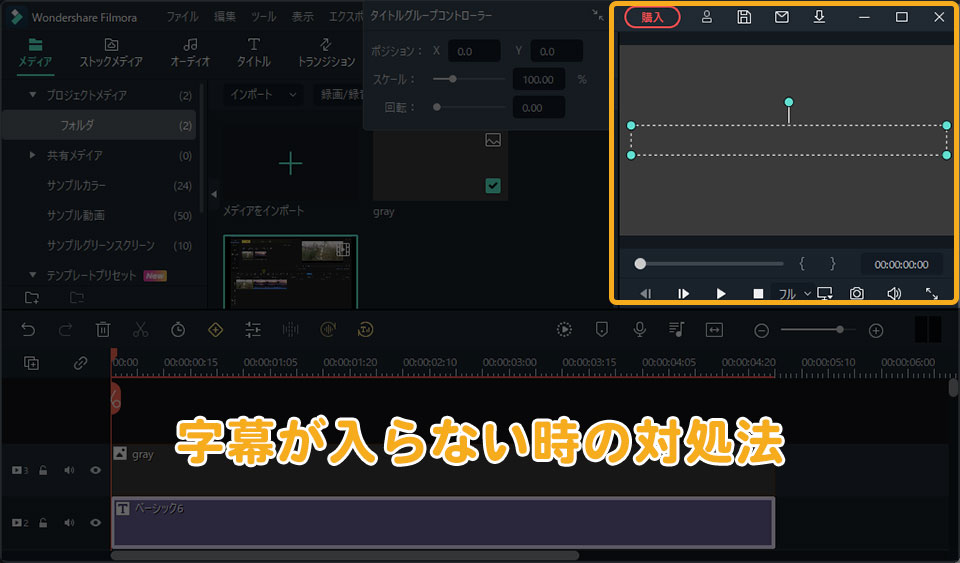
字幕が入らない原因は、次の4つ考えられます。
- タイムライン上のテキストトラックがビデオトラックの下にある
- テキストトラックが非表示になっている
- 字幕・テロップが透明になっている
- Filmoraの不具合
それぞれの対処法は次の通りです。
1. タイムライン上のテキストトラックを上に移動する
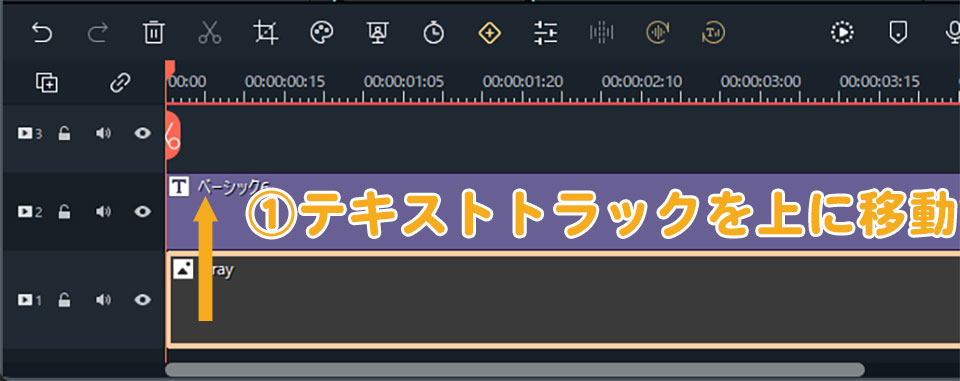
タイムライン上のテキストトラックを、 ドラッグ&ドロップでビデオトラックの上に移動します。
テキストトラックがビデオトラックの下に配置されていると、字幕・テキストが表示されません。ビデオトラックに隠れてしまうからです。
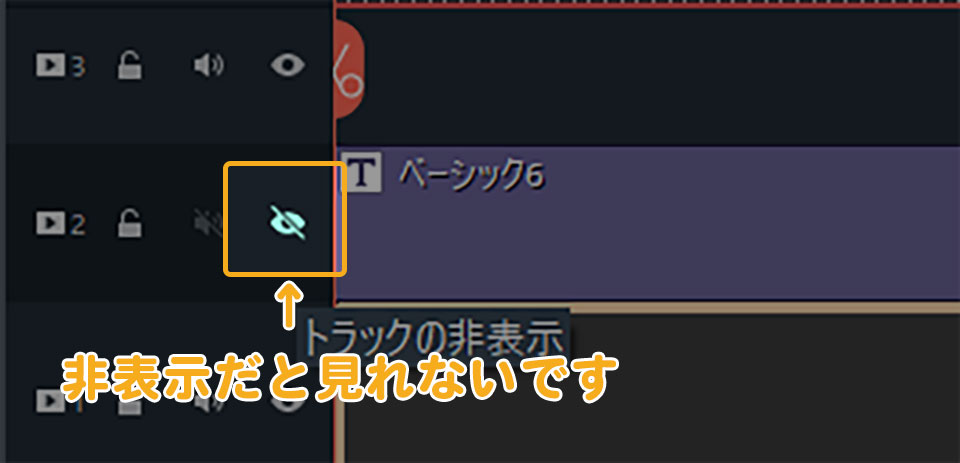
2. テキストトラックを表示にする
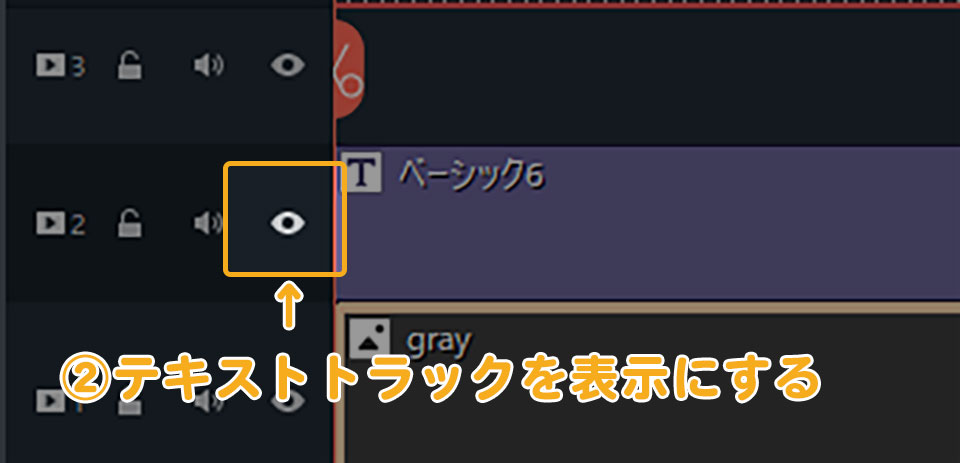
タイムライン左にある「トラックの表示/非表示(目のマーク)」を確認。もし非表示になっていた場合は「表示」に切り替えましょう
3. 字幕・テロップの不透明度を「100」にする
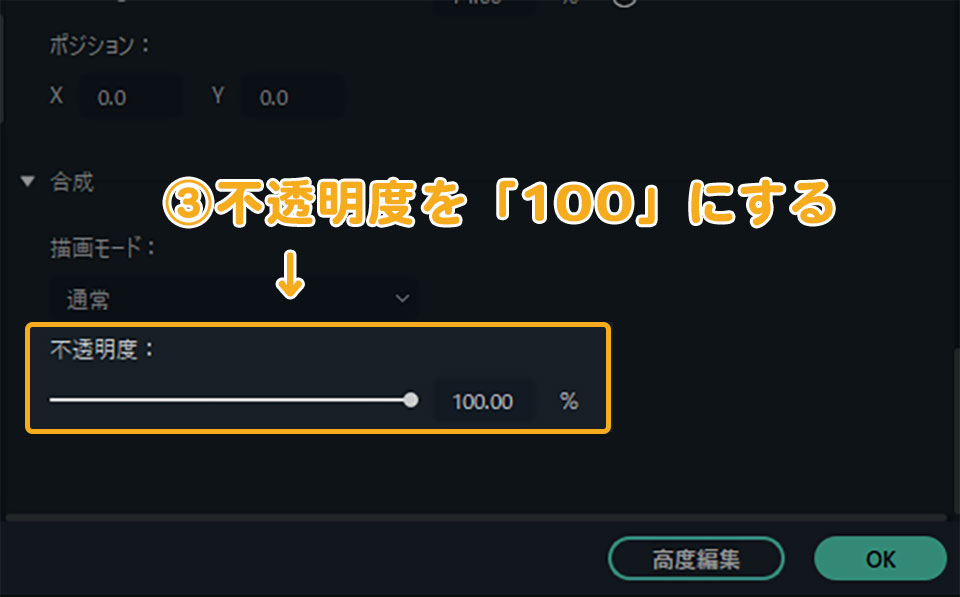
テキスト編集画面の合成内にある「不透明度」を確認。もし「0%」になっていたら「100%」にしましょう。
4.再起動・最新版をダウンロード&インストールする
Filmoraの不具合で表示されない可能性もあります。次のことを試してみてください。
- filmoraを再起動
- PCを再起動
- 一度filmoraをアンインストール、最新版をダウンロード&インストール
これでも不具合が解消されない場合は、サポートに問い合わせましょう。
» https://filmora.wondershare.jp/support.html
まとめ
本記事は、Filmoraの字幕・テロップの入れ方について書きました。プリセットも用意されているため、早く簡単に見た目の良いテキストを動画に入れることができます。
透かしは入りますが、Filmoraは無料で使うことも可能。動画編集選びで悩んでいる方は、ぜひ一度使ってみてください。
以上、長谷川(@ksk_photo_man)でした。